


Hey friends, it’s Sarah from @essjay_florals and I’m going to share some fun ways to use your Acrylographs. Obviously, there are the usual places that we know Acrylograph pens work amazingly, but what else can we test them out on? In this article I’ll test them on all the surfaces you’ve been dying to know if they work on and maybe a few others you hadn’t thought of as well. For this article I mostly tested using the 0.7mm nibs as they are plastic and I have found they are the ones that tend to catch on certain surfaces and cause the paint to splatter. However, the 3mm, being felt tend to not have this issue.
Want to get your hands on some Acrylograph Pens? Get a Collection here and get your Individual Pens here (Don't forget to use my code SARAH10 to receive 10% off your Archer & Olive order)
Rating System:
* Difficult
***** Easy

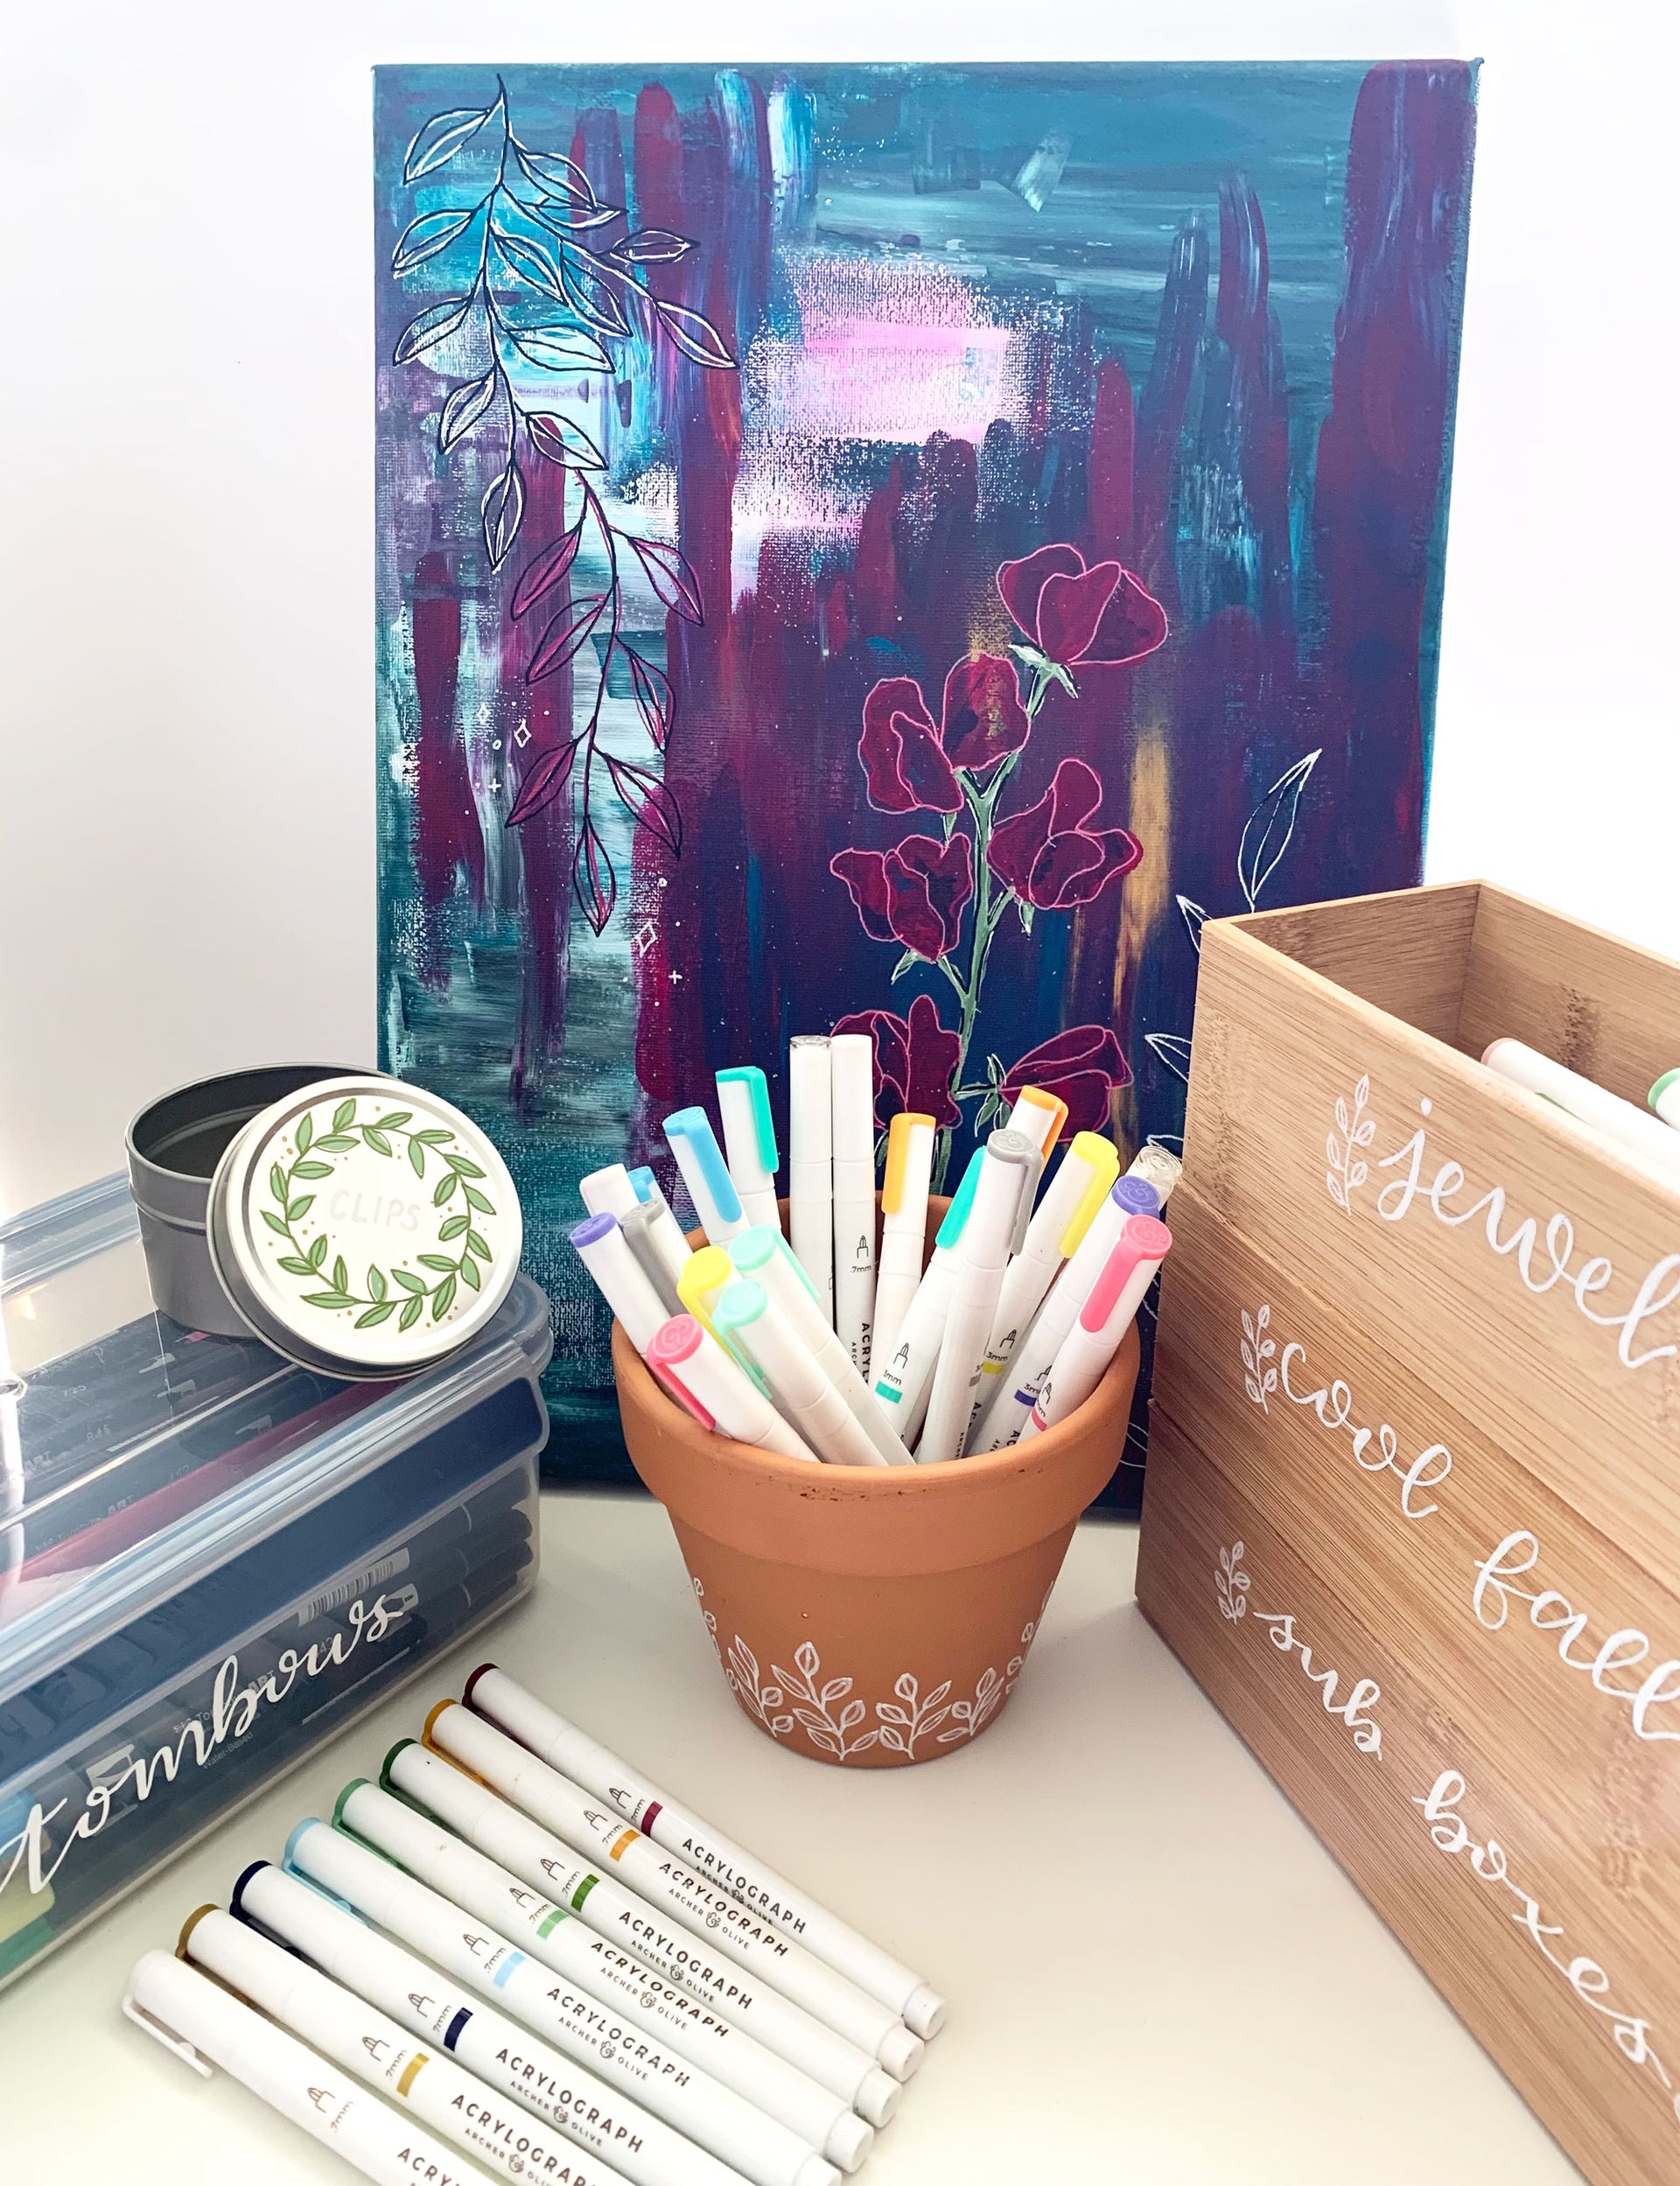
Primed Canvas – ***
They work well, but if you go too quickly there is splatter as the nib catches on the surface (I used this to my benefit in the painting I created where I deliberately drew quick to get the splatter), but obviously beware as using your pens in this manner will wear on your nibs, but I’m a rebel and renowned for destroying all sorts of nibs, haha (Note: after all the testing and writing this article my nibs are still fine, but fair warning). I later tested using a 3mm nib pen and this had no issue with splatter.
Glass: Photo Frame – *****
This was a really fun test, and they worked well. I painted a little watercolour piece and then popped it in a frame and added some little florals onto the glass. This was a really fun little experiment and the pens worked brilliantly on the glass. Bonus points I was able to rub off the paint with a baby wipe as I went (this just needed a little bit of a scrub to get it off). I will definitely be experimenting more with this in the future! For the 3mm I’d make sure the nib is flowing well prior to avoid streaks from the felt tip.
Bamboo: Boxes – ****
I have this really cute cheap bamboo boxes that I’m storing my Acrylographs in and I had some boring dymo labels on them and I thought why not try my pens on here? The verdict, I loved writing on them, they work really well! I even made a massive mistake and was able to clean it off and redo it. The surface of the boxes are quite rough and so I needed to write very slowly and gently particularly on my down strokes to avoid the nib splattering. I had to do 2+ coats for the lettering, but in the end, it was a winner. With the box I made a mistake on, I misspelled a word and I ended up scrubbing with a magic eraser which removed most of the paint and then gave it a light sand. I was then able to start the steps again and it was completely fine.

Metal: Tins (Iron) – ****
I have these little tins that I like to store bits and pieces in and so of course I had to test and they worked well. Drawing on these tins was very easy and only needed one layer. I actually struggled a little when I did try and layer, as if I pushed too hard the nib picked up the dry paint. But generally, they drew well and glided nicely over the surface.
Plastic: Storage Container – *
Drawing on this surface was very difficult to do as it was so smooth and not very stable, so it made it difficult to get enough traction, they didn’t work well. There was a lot of priming in between strokes and the nib kept picking up dry or partially dry bits of the paint. But after a few coats it got easier and has dried nicely.
Canvas: Bags – *
They didn’t work well; it was really difficult to draw. If the fabric is pulled taught like on the canvas, I’m sure it would be easier. I found the nib constantly caught on the fabric and fibers from the material kept getting caught in the pen. It took much longer to draw and this was the longest to dry, I couldn’t layer over the top for a few minutes. I believe using a 3mm nib pen would help minimise the splatter, but it would still be difficult.
Journals: Faux Leather and A&O – ****/**
I attempted to write on a few of my finished journals and found the faux leather ones to work well. I was able to write straight away, very easily with little trouble, and only needed one layer. The fabric journal I struggled with, again I had the problem of the nib catching and the paint was seeping into the fabric so I had to go over it 3 times for the paint to be opaque.

Wood: Cubby House – **
This was really hard to draw on, the rough surface made the nib catch a lot and there was a fair amount of splatter I’d say they worked okay. For best results I’d recommend sanding the surface well to make the wood as smooth as possible, I believe this would make the drawing experience significantly better. I did find using the 3mm to get colour down helped prevent the splatter and it was effective to then use the .7mm to layer on top and make it more opaque. I needed a lot of coats (4+) and I again found upward strokes the most effective for minimising splatter. I found that whilst the .7mm nib did splatter when rushing, it was more effective for ensuring a more opaque coverage.
Chalkboard - ****
They drew easily and worked well, but needed 2+ layers to get it nice and opaque. They were very easy to draw with, but very difficult to remove. Therefore, I would highly recommend them for creating milestone boards, where you update part of the information in chalk, but anything drawn in Acrylographs would be quite permanent.

Ceramic – *****
This was possibly my favourite surface, they worked really well as it had a nice smooth surface. There was no catching and no need to use multiple layers, and layering colours was fine.
Rock – ****
They worked well on the smooth rock, again any parts of the surface that were uneven did cause the nib to catch a little. But otherwise, they worked really well and only needed one layer of paint.
Teracotta Pot – ****
They worked well, the paint did seep in a bit but was still quite opaque and didn’t need an extra coat. However I did use 2 coats and it was quite effective in coverage.
Laminated Plastic - ****
This was surprisingly one of the easiest surfaces to draw on, and they worked well. However, adding extra coats was difficult as the nib did scratch some of the paint off the layer beneath. You need to be quite careful and not put too much pressure, but it is possible. I believe using a 3mm nib pen would help to minimise this issue.

Photo Paper – ****
Matte & Gloss – I thought these would be hard but they worked well once I had the ink flowing, it was very easy to draw on the surface. I recommend ensuring it’s flowing well prior to drawing on the photo. For the 3mm I’d make sure the point is flowing well to avoid streaks from the felt tip. Note: I couldn’t get gloss photos from my local printer so I tested it on a photo from my HP Sprocket.
Cardstock - *****/***
Smooth – they work well and it was really easy to draw, no need for multiple layers, no splattering of ink as the nib runs smoothly over the surface.
Textured – they work well, with no need to use multiple layers. However, you need to be careful and go slowly, not pressing too hard as the nib will catch on the surface as expected. I believe using a 3mm nib pen would help minimise the splatter.

Eggshells – Easter Fun! - ***
The most difficult parts of this were; blowing the eggshell to get the egg out & carefully holding it so I didn’t crush it! Haha! Otherwise, this was relatively easy to draw on and they worked well.
I hope you have enjoyed watching me test Acrylograph pens on all the surfaces! Maybe you want to try and test on something else, if you are up to the challenge why not use the hashtag #acrylographsinthewild and share what you’ve used them on too! Don’t forget to tag myself at @essjay_florals & @archerandolive if you’d like to share.


0 comments