


20 Top Easy Bullet Journal Header Ideas
Hello Friends! I’m Neus, @miss.meissa on Instagram and YouTube, and today I'm going to show you 20 easy ideas to make titles or headers so you can refer to them whenever you create a new spread in your bujo.
You can also use these bullet journal header designs for your class notes or if you need to design titles for your planner. And of course you’ll find bullet journal font ideas for your letterings, greeting cards and other creations.
Supplies
- Archer and Olive Journal (you can also use a notepad).
- Archer and Olive Acrylograph pens.
- Archer & Olive Calliograph brush pens.
- Pencil and eraser. I’m using the mechanical pencil in A&O June sub box.
- Fineliner. Also from the A&O June sub box.
(Feel free to use my affiliate code MISSMEISSA for a 10% off at archerandolive.com).

If you want to see how I create the titles I invite you to watch this video:
Bullet journal header styles
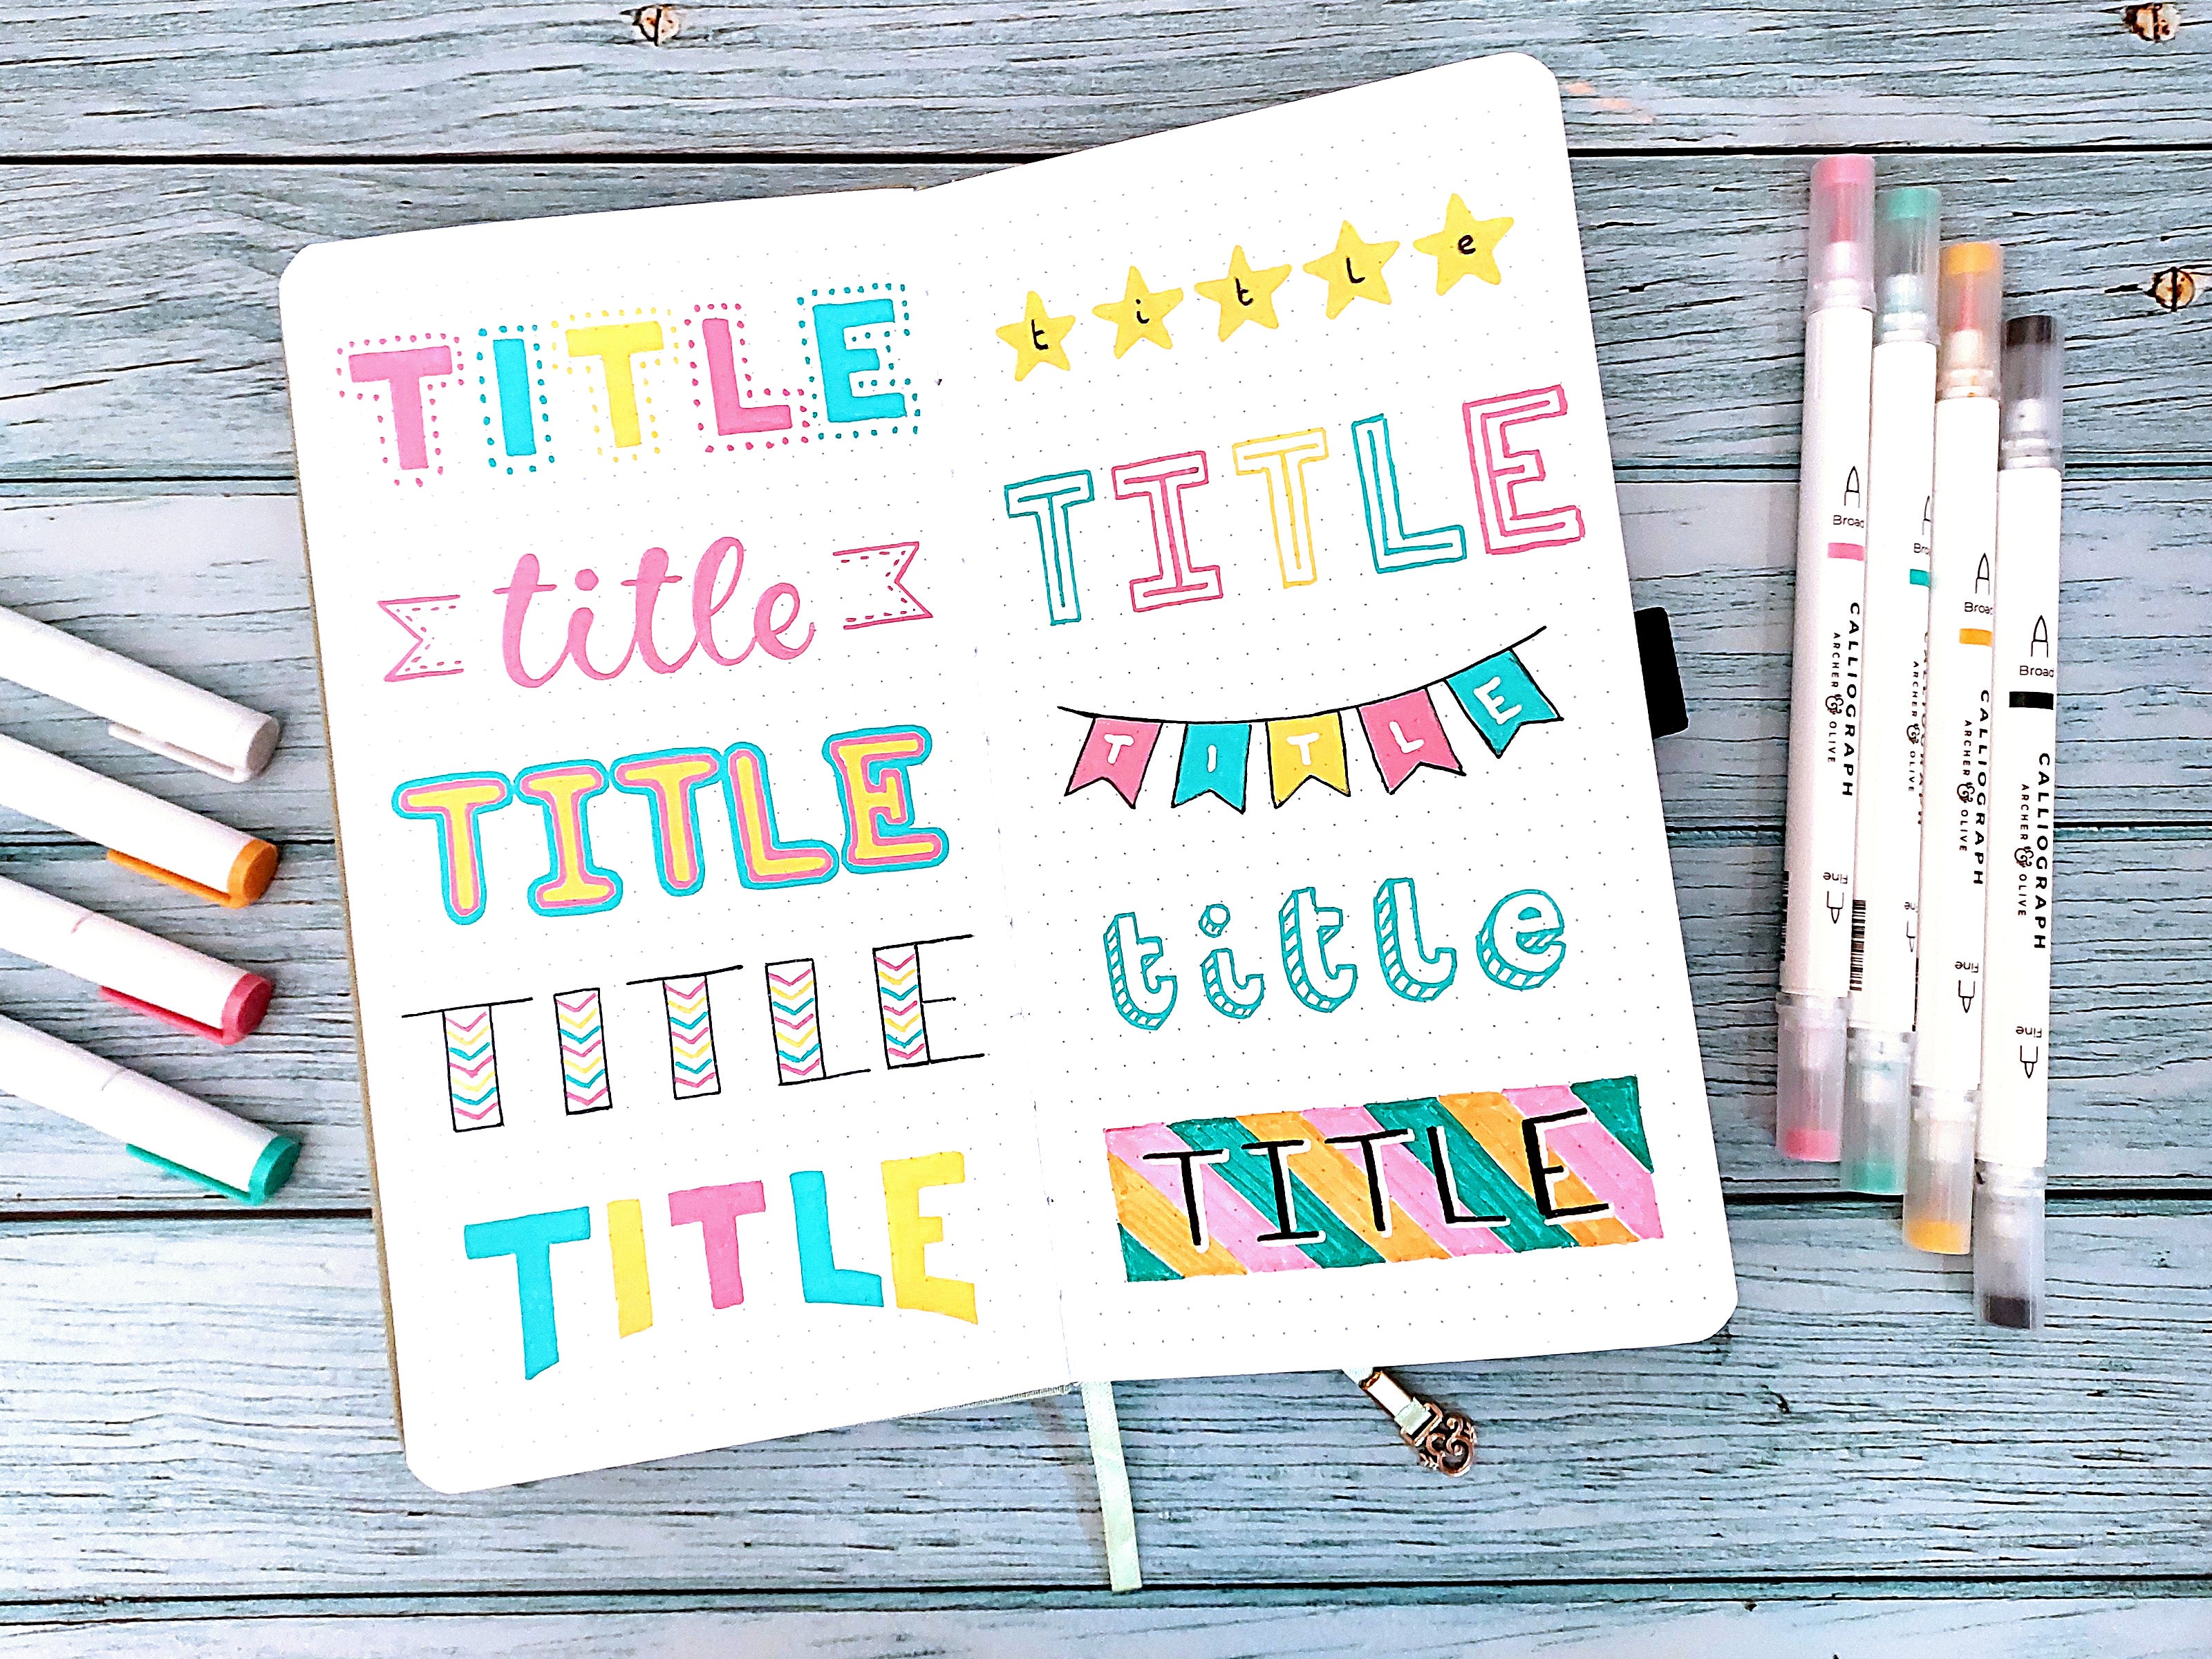
I'm going to write the word "title" as an example to show you all these styles but, of course, you can use them in your own words and headers. I am using three colors from my favorite acrylograph pen set: the tropical collection.
The first idea is a quick one. I’m using block letters combining the three colors: pink, teal and orange yellow, painting each letter with a different one to make the word more colorful. Of course, you can use the same color for all the letters or combine the ones you like the most.
To make it prettier, I’m painting dots around each letter as you can see in the picture. You can follow the dot grid of the notebook to be sure that all the letters have the same thickness.
In the second header I'm doing faux calligraphy, but you can write the title in a monoline or in calligraphy if you prefer. To do faux calligraphy, you just have to write the word and make it thicker in the descending strokes by drawing a double line and filling it in.
Leave some space in the sides cause next we are going to draw some flag ends, as if this title was inside a banner. If you don't want to draw it you can also use washi tape. If you want a lot of ideas to do this, be sure to read my blog post or watch my video about washi tape ideas.

In the third idea I start drawing letters with some thickness and a little bit rounded. You can also do this with a thicker marker and a single line. The letters have to be a little apart from each other, so don't make them too close together.
The next step is, with another color, in this case pink, draw an outline around each letter to give it some contrast. Try to make this line more or less uniform. Once finished, we paint a second outline with the third color, which in this case is teal, in all the letters. I like it with two outlines but you can continue painting more if you prefer.
For the fourth idea, draw very wide letters with a fineliner, just the outline. And fill them with some v-stripes on the inside alternating colors.This style of lettering is super easy to do but very pretty and cheerful.
Next, we are going to paint block letters again but differently. This title will have a curved bottom.
To make it easier, first draw in pencil a semicircle at the bottom of the paper, where the lettering will rest. This line will serve as a guide to draw them later, starting from the center, so that the title is centered. First the central letter, then the two on the sides and then the two at the ends. Follow the dot grid of the notebook for the top part. And once finished you only have to erase the pencil line. I recommend this especially for short titles.

Now a decorative idea: let's paint stars. You have to paint one for each letter of the title. Fill them well and let the paint or ink dry. And once dry you just have to write over the letters.
For the number seven we are drawing block letters again but this time we draw only the outline. You can use the dot grid of the notebook to calculate the size of the letters so that they are all uniform. And then draw a line in the central part following the shape of each one of them.
For the next header idea, draw a slightly curved line with a fineliner. We will draw small flags alternating colors for each letter. I recommend starting with the center one so that all the flags are well distributed and the letters are centered. Wait for the paint to dry well and if you want you can outline them with a fineliner. And, of course, write each letter on one of the flags. I did it with a white acrylograph.

Another idea is to draw the outline of thick lowercase letters and give them a 3d effect with some shading. Look at the picture to see what I'm talking about. You could also paint the front part or the part of the volume. And it's a very easy way to have a nice title.
For the number 10, draw a rectangle in pencil to serve as a box and divide it with diagonal lines. Fill these spaces of the square. I’ve used the Calliograph pens in the same palette but you can also use pastel tones for these backgrounds that are going to have letters on top. It would also look very cool to paint each stripe in one of the colors of the rainbow.
Once the background layer is dry, write the letters. If you want you can also add a stroke as a shadow in white to make the letters stand out more. Or you could also outline them.
Now a very simple idea. Draw the title with lowercase letters very separated. And decorate it with some little stars between letters. Easy peasy.
This is number 12 and we are drawing block letters again, only the outline. And this time we decorate them with some dots on the inside as you can see on the picture. If the lettering is big you can also fill it with stars.
The next one is one of my favorites. Draw the block letters first in pencil as a reference. And paint a 3D effect in each one of them as in the picture, making diagonal lines from each of the angles to the horizontal lines. Fill them well and erase the pencil to have this cool style.

Now we are going to make a different volume effect.
You need to paint letters that have angles, they cannot be rounded. And then draw a few lines from each of the angles at the bottom to a point centered below creating vanishing lines. Look at the photo to see what I mean!
A very simple but beautiful style is to draw serif letters. I like to draw only the lines, without filling them and then add diagonal stripes for decoration. If you prefer you can paint them completely.

Now let’s draw the outline of some thick lowercase letters. I like this style of lettering very much because it is very decorative. And I like to decorate it by filling in only the bottom half of the letters. You can draw a horizontal line with pencil first to make it easier, or use the dot grid reference.
For the style number 17, draw some squares in different colors, one for each letter. Use the dot grid to make them all similar. You can start in the center to place them easily. Fill them and draw some lines hanging. Add little drawings at the end of each line: stars, hearts, moons, flowers, diamonds. Whatever you like. And of course draw the letters on the squares.
For the next style start by drawing in pencil block letters as we have done in several styles. And then, fill in these letters by painting thicker and thicker lines. The first has to be quite thin, the next one thicker and the next thicker than the previous one, from side to side. If you want these spaces to be more perfect you can also use a ruler, but I like it not to be so perfect. Once finished you just have to erase the pencil.

Now we are going to paint letters imitating balloons. To give them volume I recommend you to use the Calliograph pens or any other medium that can achieve different intensities of color. We need the outline to be super intense and the center almost white.
I recommend to use a water brush to blend the color. You can use a palette or plastic and unload a little bit of marker to take it with your water brush so you can use it as a watercolor paint. And you can also use the brush directly to blend the strokes you have made in the notebook and mix them well. If you use a normal brush, be careful not to use too much water. The paper of the Archer & Olive notebooks is thick and resistant but you don't want to puddle it.
After that, use the fine tip of the caliograph pen to imitate the knot of the balloon and draw with a fineliner the lines that represent the string of each of the balloons. This style of header is more elaborate but looks beautiful. And you can perfect it even more by adding some highlights and pleats to the balloons.
To conclude, a very easy one. Draw a horizontal line and add a small dot in one of the ends. Paint a little flag beside it and simply write the title. I’ve done it in calligraphy using the small tip of my dear black calliograph.

You can also download all these ideas for reference.
Click to download now: 
Thank you for following this article and drawing headers with me. I hope you enjoyed doing it!
If it has inspired you and you post the result, you can tag me, @miss.meissa, and @archerandolive so we can see them (we would love that!). And don’t forget to add #AOShare and #archerandolive 😊
If you want more creative ideas for your bullet journal, check out these articles:
25+ Best Bullet Journal Themes For 2022 by Dano from @danosbujo
12 Creative Themes For Kraft Journals by Missy Briggs
Ideas For Blank Pages In Your Bullet Journal by Nabaa Afridi
You can also check my resources or see more of my creations and videos on my Instagram and Youtube accounts.