


How To Create A Negative Lettering Pattern For Fall
It’s that time of year again: rainy days, dark nights, hot drinks, cosy jumpers, candles burning and forests walks. Autumn/fall has to be my favourite time of year, and that’s why I like to celebrate the change in seasons in my bullet journal. If you love autumn/fall or not, keep reading for a tutorial on how to create this negative lettering pattern!

Recommended Supplies:
- Archer and Olive Blackout Journal – The same amazing quality as the regular dot grid journals, but with black paper! The dots are just the right size and colour to see easily, but blend in when you’ve finished a spread.
- Pencil – To carefully plan out your ideas so you can make sure your spread has everything you need.
- Gel Pens - I’m new to the gel pen world, but the Gelly Roll pens work amazingly in this journal! They’re my go-to for all my spreads in the Blackout Journal!
Sketch
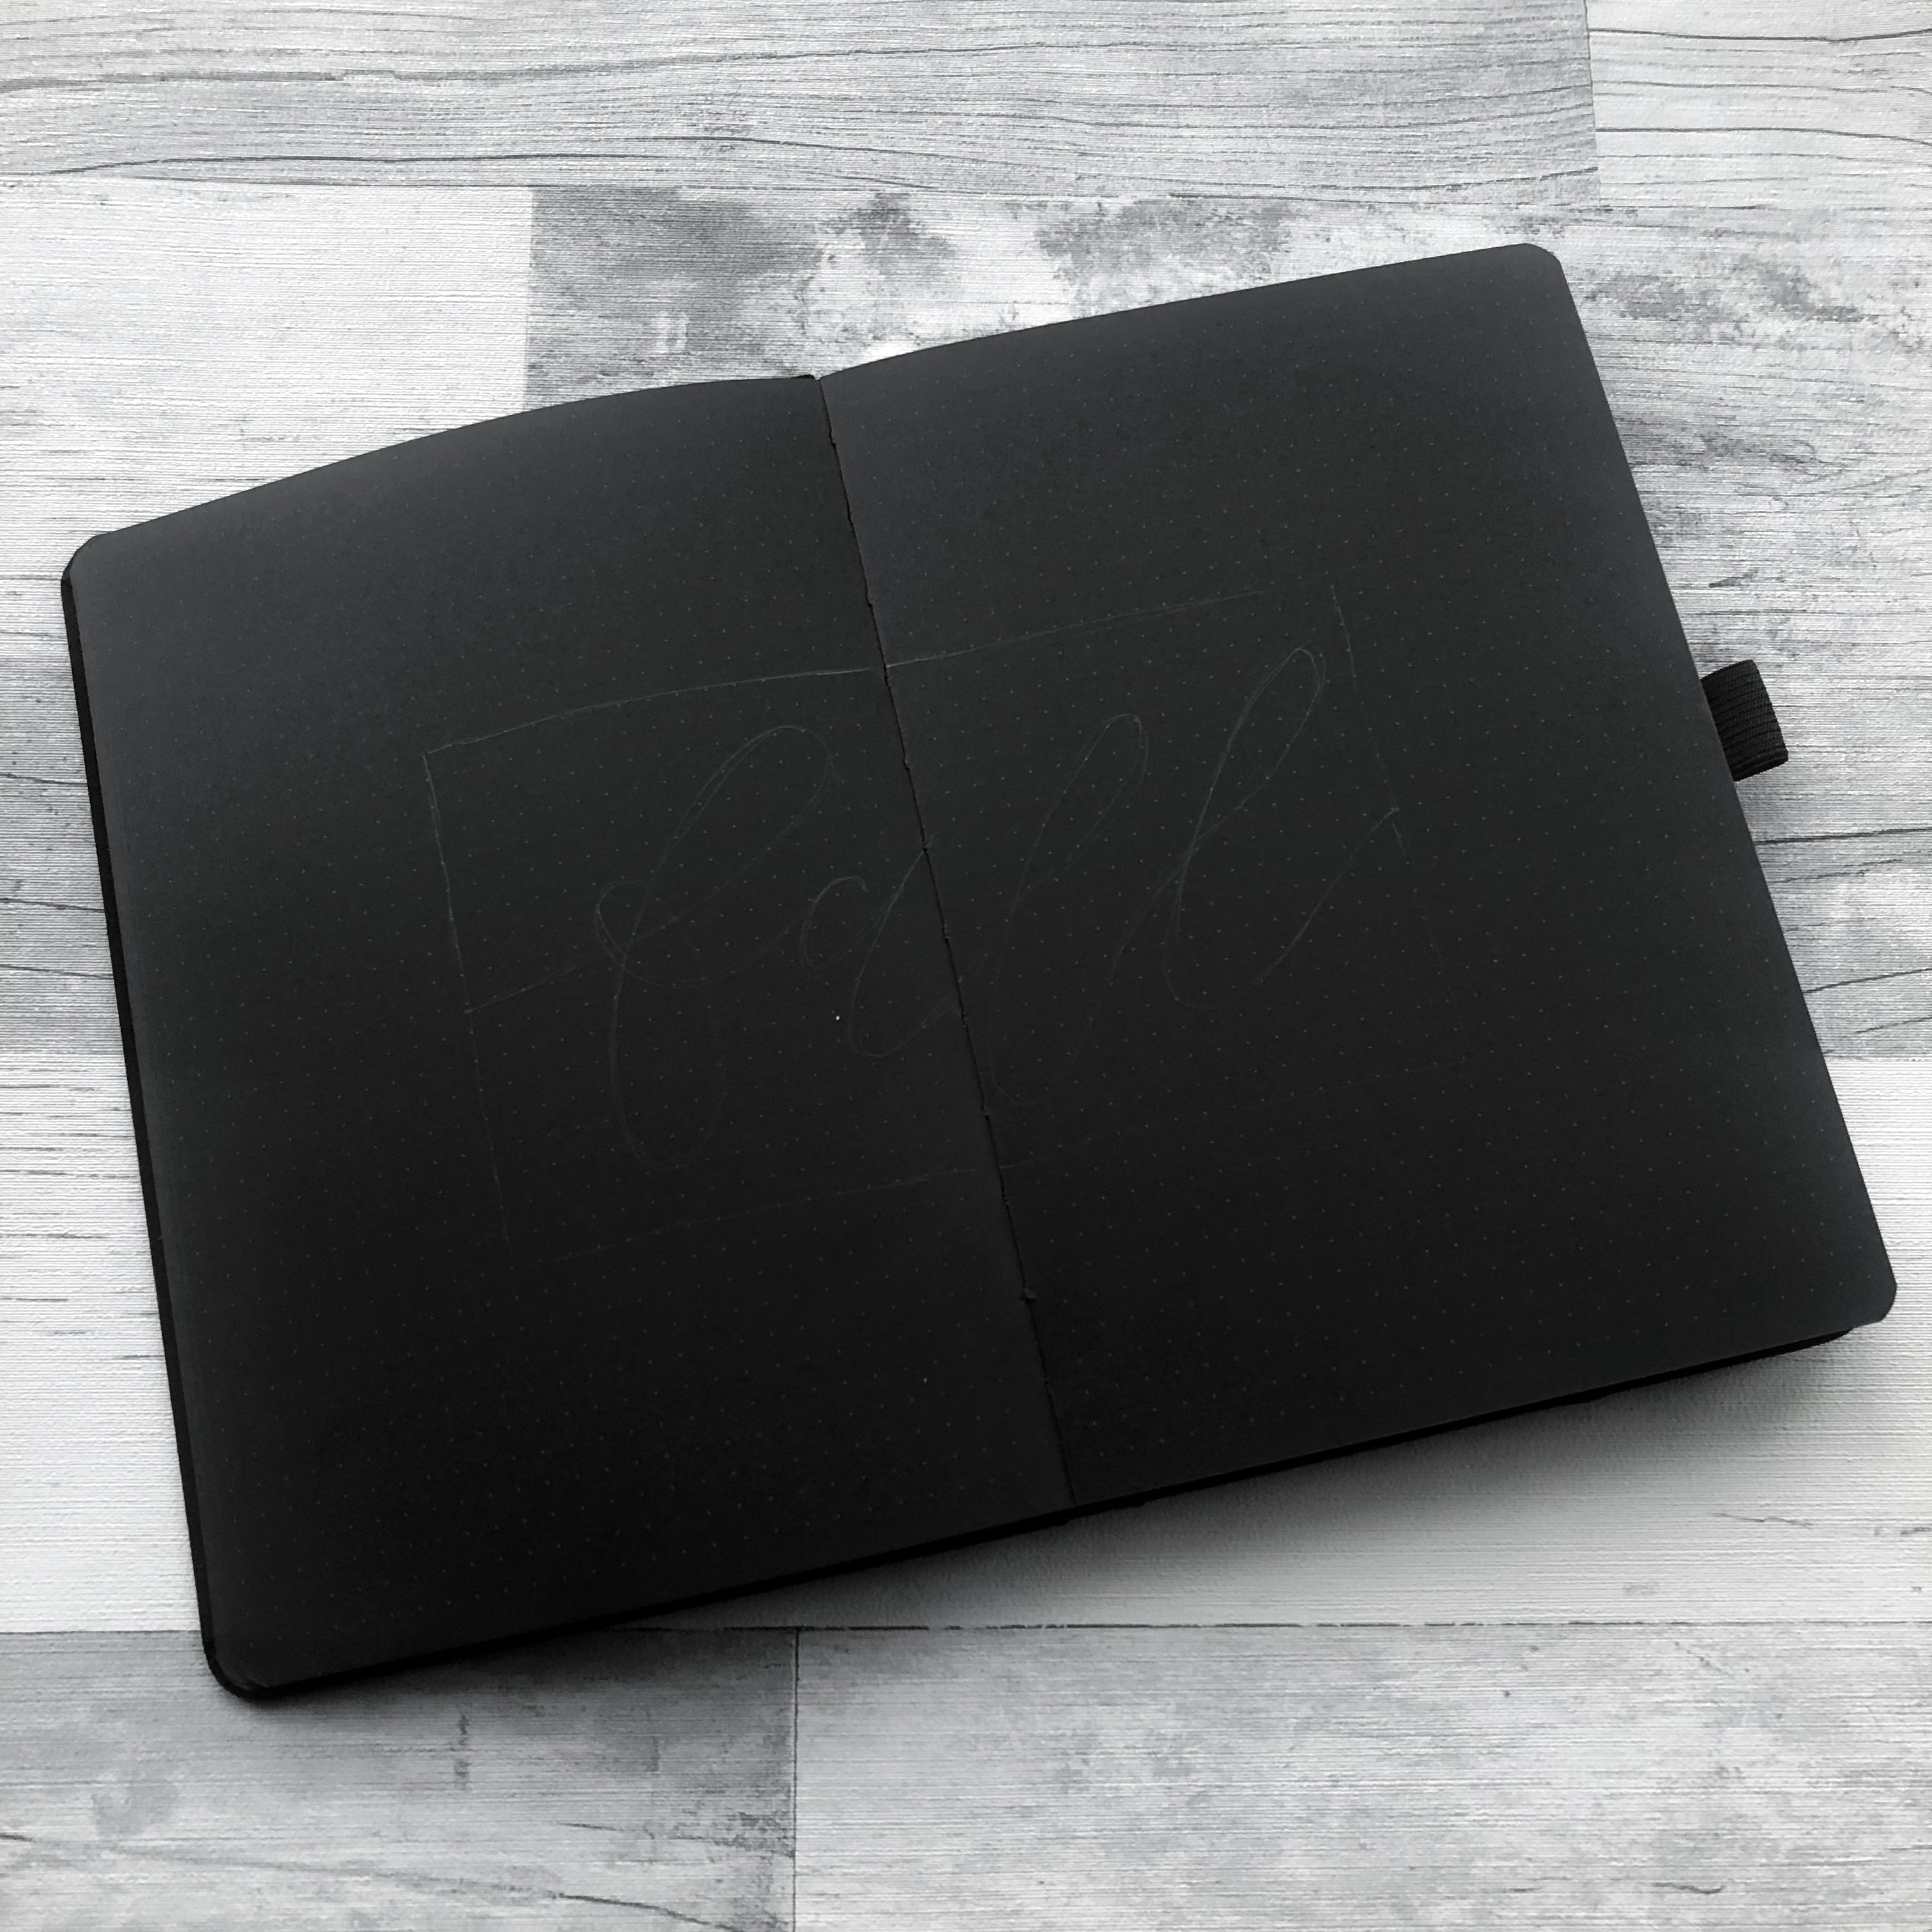
The first thing you want to do is figure out the placement of the design. I decided to do a box in the middle of the page: 20 squares high and 30 squares wide (15 squares on each side of the page not including where the dots stop in the centre of the page).
To make it centred, there are 9 squares at the top and bottom of the design. This also works really well because I want to use 4 colours, so each colour can have an equal amount of lines.
I then also did a quick guideline for where the lettering would be to check it fits well! I chose to use “fall” even though we say autumn in the UK as I think it looks prettier in cursive,
Lettering

Next, I worked a little more on the lettering – still just in pencil. As this is a negative pattern design, the cursive lettering is a guideline of where NOT to fill in with pen. Therefore, I have thickened up all the lines to make sure it will be striking with the background lettering is filled in. I also thickened the down strokes a little more than the rest to give it the effect of brush lettering.
Fill In The Background
Now this is where the magic happens! As you can see in the video, I am now going in with Gelly Roll pens in the background in a bold font (preferably all capitals). The goal is to fill as much of the background with the repeated word as much as you can, so the portions you are leaving are even more striking.
The biggest rule at this point is making sure to not to go over your pencil guidelines. But don’t worry too much as it is really easy to fix it in the blackout journal if you do!
Fixing It Up

If you accidentally go over some of the guidelines, go over the gel pen with a black marker. Something that dries matte (Tombow Fude pen) is the best way to make sure it blends in to the black paper.
Choose Whatever Word You Want
And you’re done! Hopefully you enjoyed making this pattern. I find it quite relaxing (especially with some Netflix on in the background).
Also, if you’re not as crazy about fall as me, don’t worry! You can do this with any word/quote you would like:

Hopefully I’ve given you some help on creating this negative lettering pattern! And if I have, I would love to see your spreads, so tag me on Instagram (@hayleyremdeart) and use #hayleyremdeinspired to get the chance to get your creations featured in my stories!